Thursday, June 16, 2011

Chocolate Couture Cake


This cake is really a tale of two cakes. A beautiful fairy tale in fact. One where two delicious cakes fell in love, got married and made an amazingly delicious baby. I came up with the idea for this cake last week while making the Chocolate Mousse Crunch Cake from our beloved friends at Our Best Bites. The cake calls for a baked Devil's Food cake, prepared according to the cake mix directions. Well, as soon as I read that, I thought to myself "hmm, this could definitely be better". This is due to the fact that I rarely make cake mixes without adding some "extras" to it. This made my mind think of Becky's Yummy Chocolate Cake recipe that I had also previously made. Ironically, or I'm going to say, by fate's design, Becky blogged about that cake that very day. We came to the conclusion that we needed to take these two awesome cakes to the next level by combining them. So there you have it, the tale of how this cake came to be.

Now, let's do this thing. Here's the rundown.

The Cake:

  • 1 box Devil's Food Cake Mix
  • 1/2 Cup water
  • 1/2 Cup oil
  • 4 eggs
  • 1 Cup sour cream
  • 1 box instant chocolate pudding
You will mix all these ingredients together in a mixer for 10 minutes. Don't ask why, just do it. Because Becky said so okay?  Divide the batter evenly into two 8" round greased pans. Bake them in an oven preheated to 350 degrees for 25-30 mins. Don't over bake these babies or you'll never forgive yourself. This cake when perfectly baked is moist and dense. 

The Chocolate Mousse:
 (This recipe was doubled to add additional mousse layers but you can choose to only to one mousse layer between 2 layers of cake. You know, if you're a sell out.)

  • 1 tsp. unflavored gelatin
  • 1 Tbsp. cold water
  • 2 Tbsp. boiling water (just heat it in a small bowl in your microwave)
  • 1/2 c. sugar
  • 1/4 c. unsweetened cocoa powder
  • 1 c. whipping cream
  • 1 tsp. vanilla

In a small bowl, combine gelatin and cold water and allow to stand for about 1 minute. While gelatin is softening, bring 2 Tbsp. water to a boil in the microwave. Whisk into the softened gelatin and allow to cool slightly.
In a medium mixing bowl, combine sugar, cocoa powder, whipping cream, and vanilla. Beat with an electric mixer until medium-stiff peaks form. Mix in gelatin mixture and refrigerate for 30 minutes.

Ganache Topping:
1/2 cup semi-sweet chocolate chips
1/2 cup heavy whipping cream
Microwave together for a minute or so until the chocolate and cream are able to be stirred together into a smooth mixture. You may want to let it cool just a bit prior to pouring it over the cake.

Let's put this beauty together!

Begin by slicing your two layers in half, so you have four. Do this with a very sharp bread knife, preferably with the cake already chilled. (also, our layers were already pretty flat and level, but if yours aren't you'll want to level the top first)

Place the first layer, top side down. Spread a layer of mousse onto the layer of cake. I used a cake decorator but that's not necessary, just more fun.


Place the next layer of cake on top of that and repeat the process


And again....


After you place your top layer, you'll pour the ganache on the top.....

 Allow it to run down the sides....
isn't that looking divine?

If that wasn't enough, go ahead and sprinkle the top with Heath Toffee Bits, or crushed up Heath Bar, like we did (this part is optional and the cake is fantastic with or without)
Isn't it almost too pretty to eat?  
Well not as pretty as the layer cake Ashley made at our last meeting, but still pretty :)

 That definitely did not stop us.....


This cake is a great balance of rich and light flavors and textures and is sure to satisfy your chocolate craving! Make it for your foodie friends and they'll be impressed.


Layer Cake


Sorry it's taken so long to post this!
Here are the yummy food pics. 


Here's the recipe I used for the chocolate cake.  The recipe is intense to make, but so good.  I like it because it doesn't dome or sink.  I like the advice of putting a paper towel (or cooking spray) down on the rack when you get them out of the pan.  I made the cake the night before.  Chocolate cake tastes better after it's settled overnight. 

Here's the recipe for the filling and frosting.  The marshmallow cream is so yummy! The frosting, I didn't care for it (a whole pound of butter is too much).  I would use a different chocolate frosting.

Tips & Tricks for Splitting Cakes: from Sweetapolita
1. Always start with a cold cake: refrigerate for about 2 hours or freeze for about 30 minutes
2. With a good quality serrated knife (I only use my favorite Mac 10 1/2″ serrated bread knife–this thing is insanely sharp), trim any doming off the top of each layer.
3. Measure the height of your layer with a ruler, then create a score line on the halfway mark all the way  around the outside of the cake.
4. Lower yourself to almost eye-level to the cake. With a gentle sawing motion, slowly move the knife gradually towards the center of the cake, then turn cake 1/4 turn, and repeat until you have cut through the entire layer.

Also more good tips:
50 Tips for Baking Better Cakes

Recipe for simple syrup you can put on your cake or cupcakes to make them more moist. You brush it very lightly on or spray it on.  This is what the pros do.

Tuesday, March 15, 2011

Cheesecake

I am a HUGE Cheesecake fan, and this is by far the best cheesecake I have ever had. Its baked (the way cheesecake should be made) and it is very creamy and tastes awesome.

Ingredients:

Crust:
1 pkg. graham crackers
1/3 cup sugar
1/3 cup melted butter

Filling:
2-8 oz. softened cream cheese (soften at room temp for 2-3 hours.)
1 1/2 cups sour cream
2 eggs
1/2 cup sugar
2 tbsp. melted butter
2 tbsp. lemon juice
2 tsp. vanilla

Directions:

Pre-heat oven to 325.
Combine crust ingredients in spring form pan, or pie plate.
Using a fork, mix together and shape into crust. Set aside.

In a blender, or food processor, combine all the filling ingredients until very smooth. No lumps people!
Pour the filling into the crust.

Bake at 325 for 35 minutes (or more) until cheesecake is set (doesn't wiggle in pan). No wiggling people. Refrigerate for 4 hours or overnight.

Saturday, March 12, 2011

OBB Top Secret PB Cup Cheesecake Tarts

Okay...so I'm not sure if they'll post this on the Our Best Bites site or not, so I thought I'd better share it with you just in case. Since we're the honorary fan-club and all I figured they wouldn't mind.

 They are SO. GOOD.

Recipe from www.ourbestbites.com. Visit their site!!!

Hope you can read this....I was too lazy to type it all up, so I just scanned it. 
May need to click on the image and make it larger to read it well enough.

Cheese Soufflé

This is the Classic Cheese Soufflé Recipe from Betty Crocker.

Ingredients
  • 1/4 cup butter
  • 1/4 cup all-purpose flour
  • 1/2 tsp salt
  • Dash of ground red pepper
  • 1 cup milk
  • 1 cup shredded Cheddar cheese (4 oz.) *
  • 3 large eggs, separated
  • 1/4 tsp. cream of tartar

    When cooking, I like to use sharp Cheddar cheese because it always brings our the flavor a lot better.

Directions

Heat oven to 350. Butter 1-quart soufflé dish or casserole. Melt butter in 2-quart saucepan over medium heat. Stir in flour, salt, and red pepper. Cook over medium heat, stirring constantly, until smooth and bubbly; remove from heat. Stir in milk. Heat to boiling, stirring constantly. Boil and stir 1 minute. Stir in cheese until melted; remove from heat.

Beat egg whites and cream of tartar in medium bowl with electric mixer on high speed until stiff but not dry; set aside. Beat egg yolks on high speed about 3 minutes or until very thick and lemon colored; stir into cheese mixture. Stir about 1/4 of the egg whites into cheese mixture. Fold cheese mixture into remaining egg whites. Carefully pour into souffle dish.

Bake 50-60 minutes or until knife inserted halfway between center and edge comes out clean. Divide souffle into sections on individual plates and serve immediately.

Cannoli

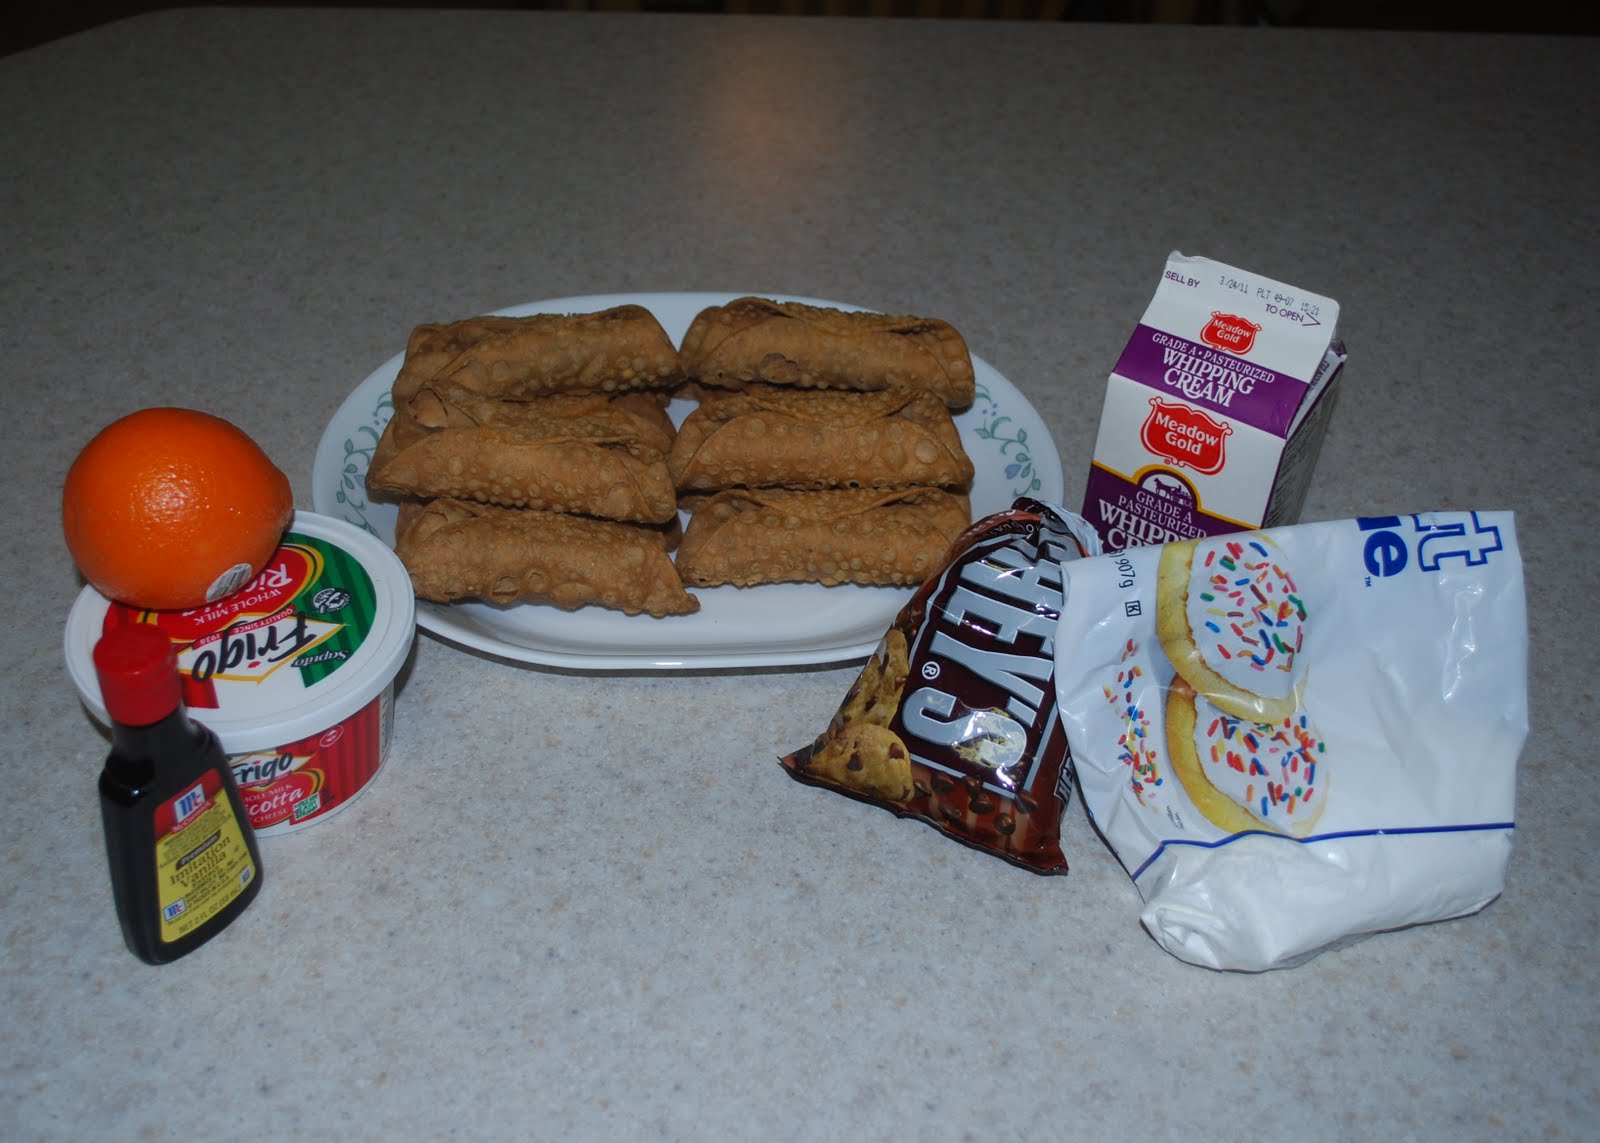
I have always wanted to try cannoli, but finding the perfect recipe was hard. I searched on many sites and in many books, and took a lot of tips from different recipes and here is what I came up with.

Cannoli
  • 3/4 cup heavy whipping cream
  • 1 cup ricotta cheese
  • 1 1/2 cups confectioners' sugar, plus extra for sprinkling
  • 1 tsp vanilla extract
  • 1/2 tsp finely grated orange zest
  • 12 cannoli shells
  • 3/4 cup semisweet chocolate chips, melted
Directions:

Dip ends of cannoli shells into melted chocolate. Lay on parchment paper to dry.
In a large mixing bowl, using a mixer on high speed, beat cream until stiff peaks form. Beat in ricotta, confectioners' sugar, vanilla and orange zest until well combined.
Place whipped cream filling into a piping bag and pipe mixture into shells. Lightly dust additional confectioners' sugar on top of cannoli (we forgot this step).

Makes 12 cannoli.
I think these were really yummy, but the filling was a little too thin. I think I may have added too much riccotta cheese. However, I did add more powdered sugar to try and thicken it, and it didn't seem to work. Still yummy though!

Sunday, January 16, 2011

Albondigas


Recipe from Rick Bayless

Ingredients:

3 slices bacon, cut into 1 inch pieces
3 garlic cloves, peeled (divided use. I only use 2 since the fire roasted tomatoes I use have garlic in them)
2 large eggs
1/2 cup dried bread crumbs
salt
1.25 lbs ground pork (pretty sure I just buy the 1lb package and it works fine)
1/2 cup (loosely packed) coarsely chopped mint leaves, plus extra for garnish if you want a pretty picture (Chelsie). I almost always use dried (3 tsp), for cost purposes.
29 oz. (two 14.5 oz cans) fire roasted tomatoes
1-2 canned chipotle chiles in adobo, stemmed and seeded (use 1 if you don't want it as spicy as mine was).
1-2 Tbsp. chipotle canning sauce (again 1 if you don't want it spicy)
1 tsp dried oregano
About 1 cup chicken broth


Directions:
Turn on the oven to 450 degrees. In a food processor, combine the bacon and garlic clove.
Process until finely chopped. Add the eggs, bread crumbs and 1 tsp. salt. Pulse several times to combine thoroughly, then add the pork and mint. Pulse the machine a few more times until everything is well combined-but not at all processed into a paste. remove the blade.

With wet hands, form the meat into 16 plum-size spheres, spacing them out in a 13x9-inch baking dish. Bake until lightly browned (they'll be browned more underneath than on top), about 15 minutes.
While the meatballs are baking, combine the tomatoes, with their juice,

chipotles, canning sauce, oregano, the remaining garlic cloves (cut in half) and 1/2 tsp salt in a blender or food processor. Process to a smooth paste.


When the meatballs are ready, spoon off any rendered fat from the baking dish, then pour on the tomato mixtures, covering the meatballs evenly. Bake until the sauce looks like tomato paste, 15 to 20 minutes.

Pull the meatballs out of the oven and pour the chicken broth into the pan (evenly, once again).

Divide the meatballs among the dinner plates and spoon the sauce over the meatballs. Garnish with avocado and extra mint leaves. Eat with corn tortillas.

Rick (te he) also says parsley, thyme (not too much), sage and basil are all delicious in meatballs.